Set up translation project
Configure the plugin
To create a translation project and configure the plugin:
- Create a new project.
- On the General step:
- Select the translation languages.
- Add the files and click Next.
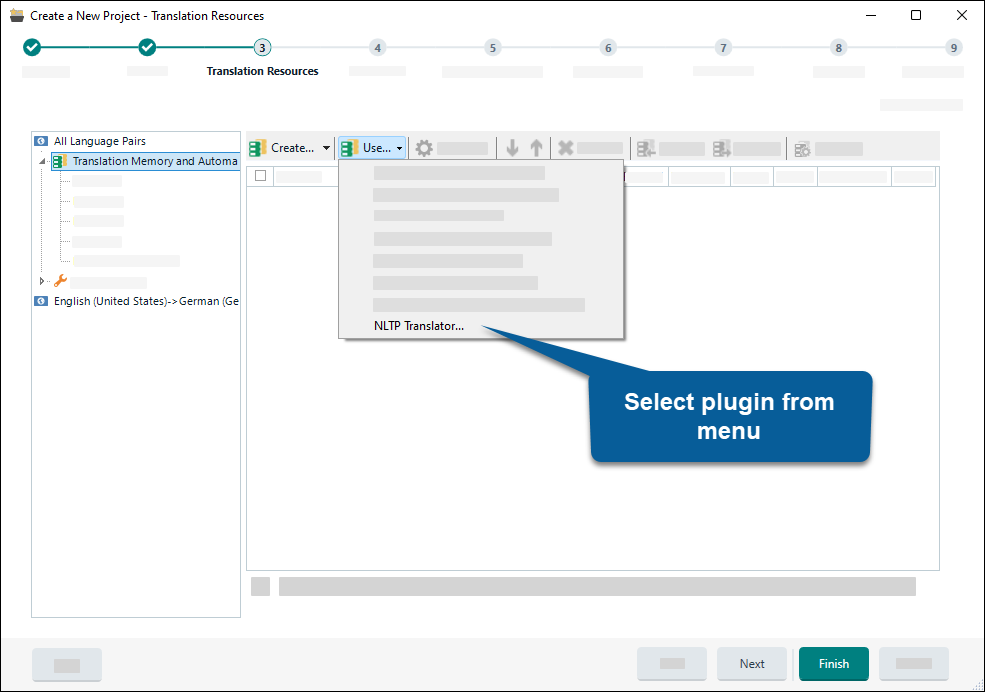
- On the Translation Resources step:
- Under All language Pairs, click Translation Memory and Automated translation
- Click Use....
- From the menu select NLTP translator.
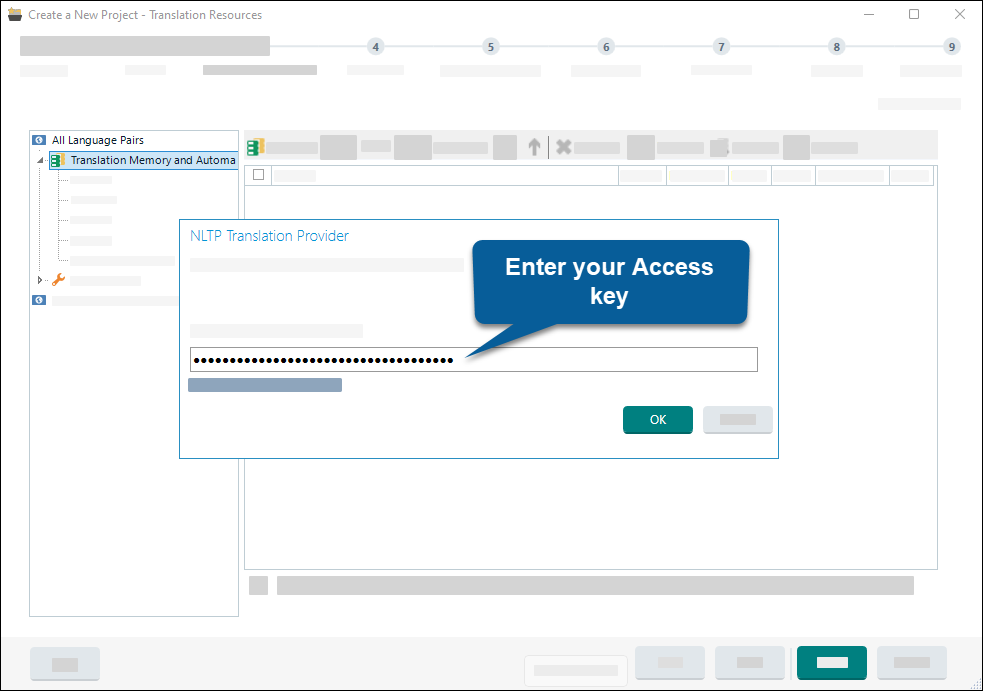
- On the plugin's authentication window:
- Enter your API key.
- Click OK.
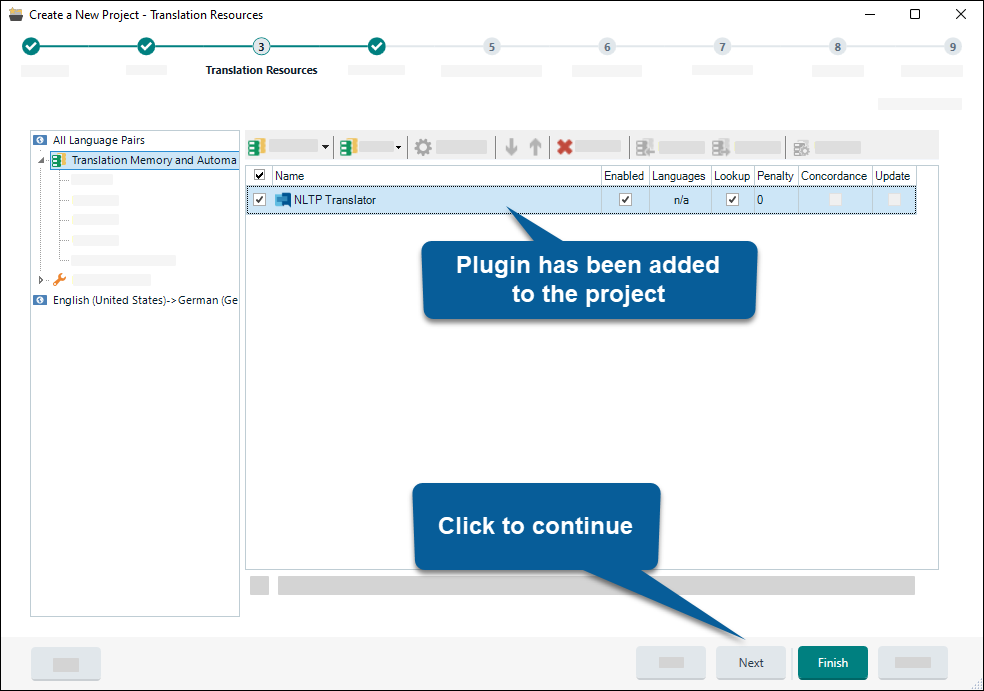
- Click Next. Go through the rest of the steps.
Project with multiple target languages
If your project has several target languages:
- Follow the steps from "Configure the plugin".
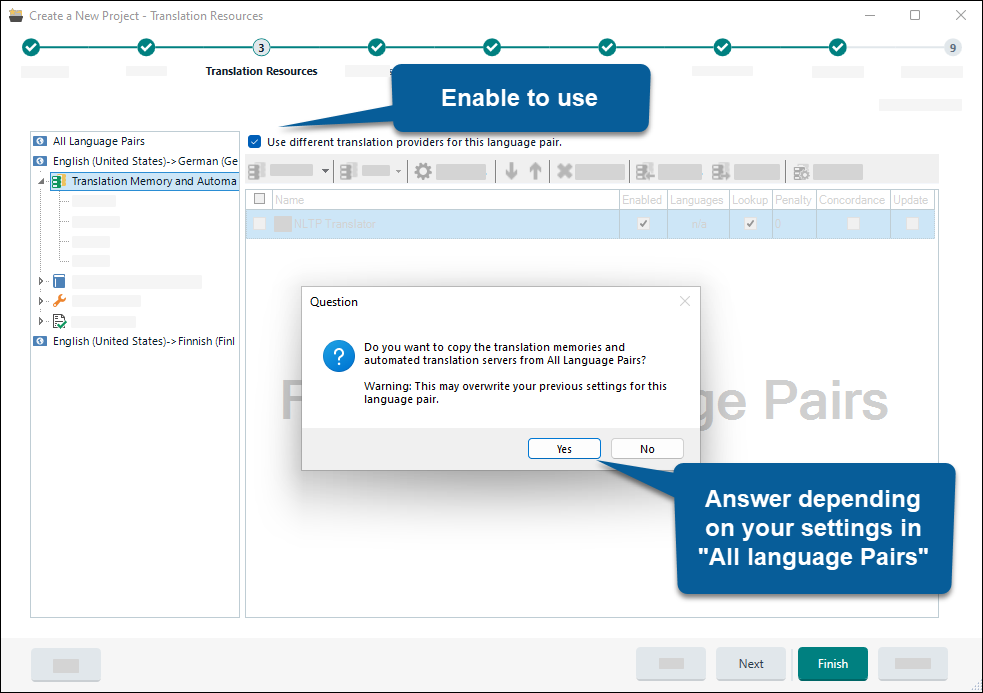
- On the Translation Resources step:
- On the left panel, select a specific language pair (instead of All language pairs).
- Click Translation Memory and Automated translation.
- Enable Use different translation providers for this language pair.
- Click Yes or No in the prompt.
- Click Use....
- From the menu select NLTP translator.
- Follow the rest of the steps from "Configure the plugin".
Enable pre-translation
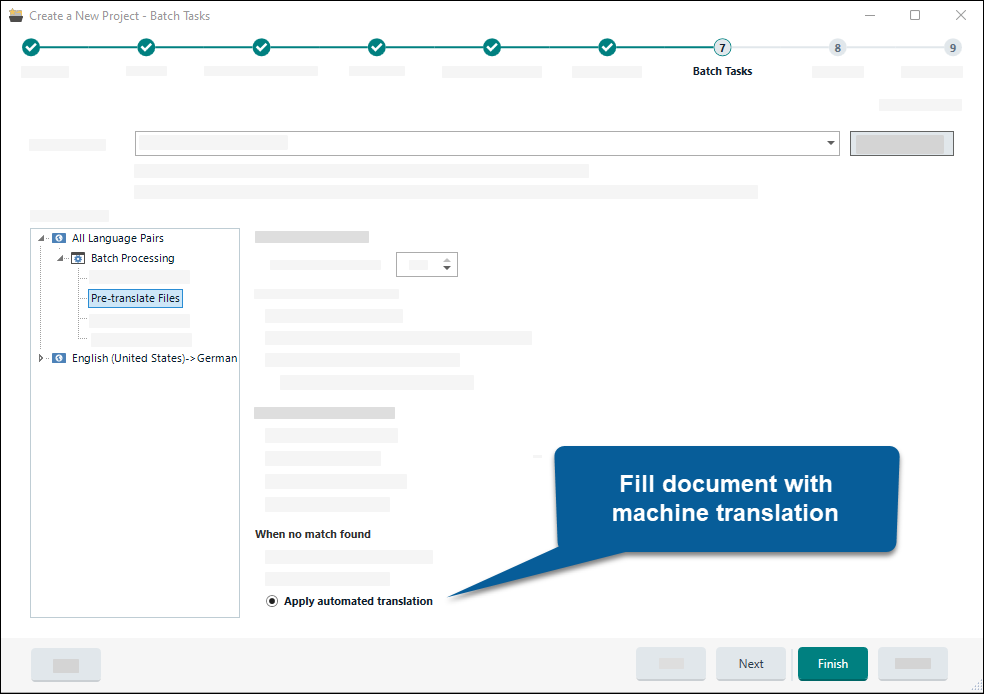
To enable pre-translation while creating a project:
- On the Batch tasks step:
- Find Pre-translate.
- Under When no match found, select Apply automatic translation.
- Click Finish.
Empty segments
If everything is set up correctly files should get automatically pre-translated and filled with translation when opened. Some segments might be empty if translation took too much time.