Getting started
Create a new integration and translate an example page.
Create new Website translator
To create a new Website translator:
- On the NLTP website, open Website Translator > My integrations.
- Click Create Website translator.
- Fill the form and click Create Website translator.
- Copy the generated integration code.
- Add the reference to the header of your website.
- Add container with
class="website-translator"where you want the language selector to appear. - Add widget configuration at the bottom of the body tag.
👉 See the Full integration guide for more detailed description.
Try an example
To create and translate a test page:
- Copy the example below.
- Replace the
src="/dist/widget.js"to the path from the code generated when creating a new Website translator. - Replace
WebsiteTranslator.Options.api.clientIdvalue from the code generated. - Save the file to your web solution.
- Open the example page in your web browser.
/example.html
<html lang="en"><head> <!-- 👇 Enter the correct source code path --> <script src="/dist/widget.js"></script> <title>My title</title> <meta property="og:site_name" content="My site name"> <meta name="description" content="Some site description."> </head><body> <div class="website-translator"></div> <p>This will be translated</p> <p translate="no">This will not be translated</p> <p lang='ja'>これを訳して</p> <p>This text is <b>bold</b></p> <p>This is an example with a <a href="">link</a></p></body><footer> <script> <!-- 👇 Change XXXXXXXXXXX to your Client-ID --> WebsiteTranslator.Options.api.clientId = "XXXXXXXXXXX"; WebsiteTranslator.Initialize() </script></footer></html>Translate the example page
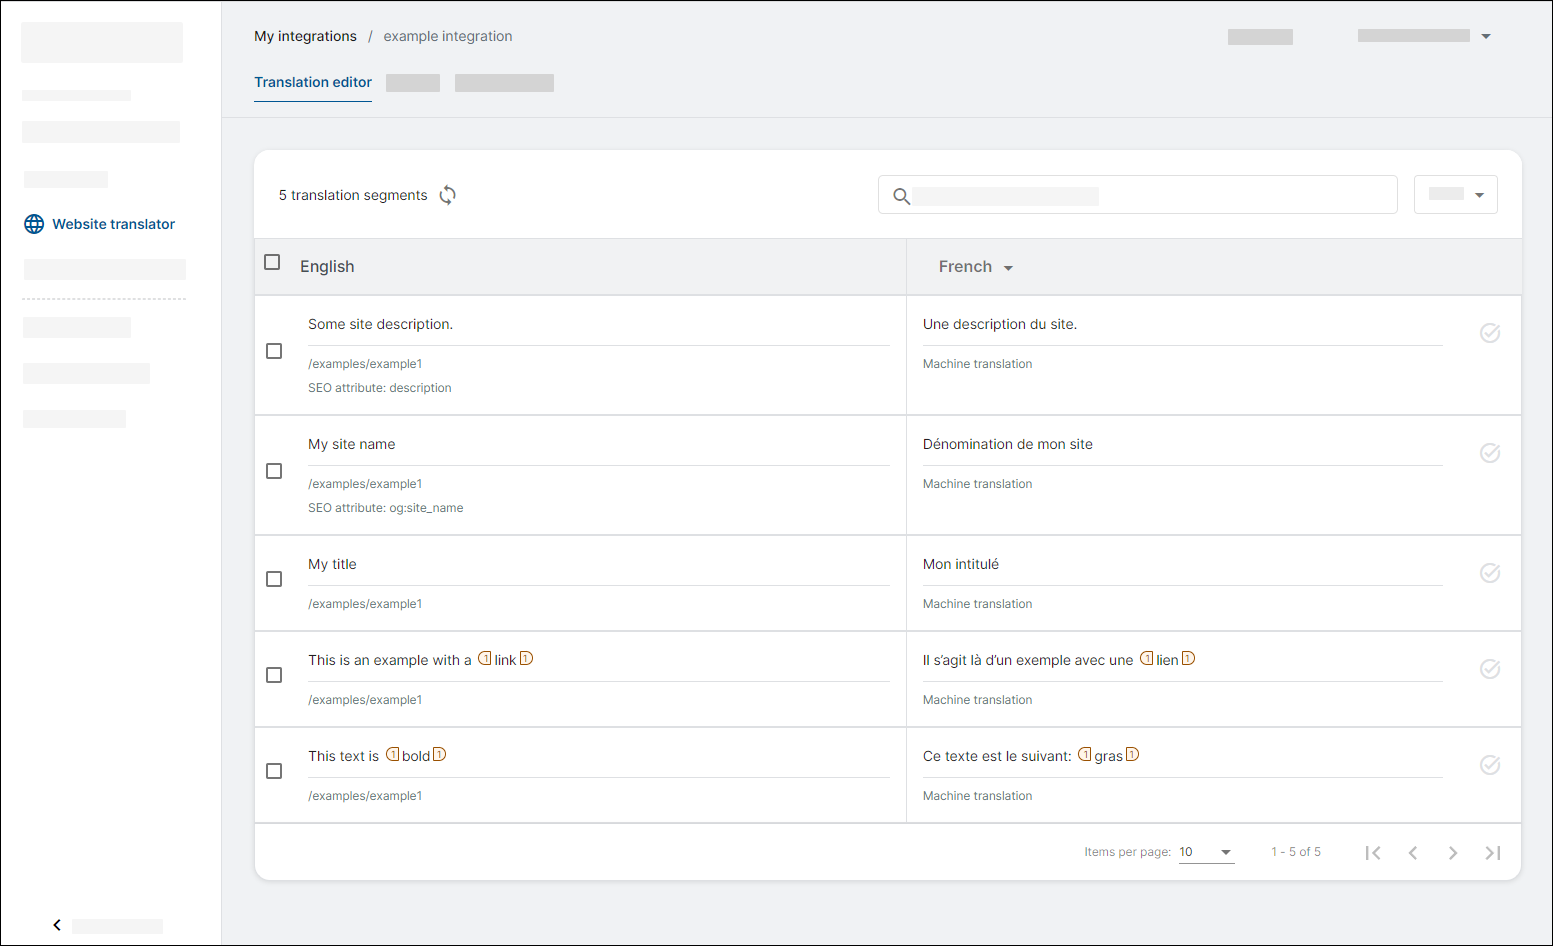
Translated text segments get stored in a database. This means that translating the same page again will be a lot quicker and you can edit translations.
https://example.com/examples/example1.html

The translations will appear in Translation editor where you can edit them.
What's next
- See the Full integration guide:
- Learn how to Manage translations